The Dragon Ball FighterZ Tutorial Sucks part 2 - Tips and Tricks
Originally published April 2018Now we come to the real reason I wanted to write articles about why the Dragon Ball FighterZ tutorial sucks. There are already tons of tutorials out there on YouTube for this game that other players have made, so I didn't feel the need to make one myself. However, I still wanted to share the various examples of lessons the game fails to teach you to illustrate my point as to how much the Dragon Ball FighterZ tutorial dropped the ball. At the bottom, I'll share a few here that I thought were useful and well-crafted. So if you don't want to read the whole article, just scroll to the bottom.
Auto-Combo Pros & Cons
The auto-combos are one of the first things the tutorial and challenge modes focus on teaching you. It doesn't take much to learn, since you're just pressing the same button over and over. Yet, for as much as the game wants you to know them, it doesn't tell you much about why or when you should use them. This is fine; I don't expect every fighting game to go over all of their mechanics in detail. Nonetheless, it doesn't do much to encourage you to look beyond auto-combos. As someone who enjoys these types of games, one of my favorite things to do is to go build my own combos and figure the game out by playing it. But there are plenty of people who probably wouldn't know any better and would assume that auto-combos do enough. That is, until they go online and get pummeled by someone else who didn't need a tutorial.
Pros
Auto-combos work great when you're in a pinch and when you're ending combos
The light auto-combo in the air is useful for extending air combos
Light auto-combos usually can beat out a clash (when two fighters' moves collide with each other)
Light auto-combos have their own special moves baked in that can't be done any other way
The special move of a light auto-combo can sometimes be a useful method of extending a long combo that has already used up its launch and slam moves.
Cons
Damage scales on light auto-combos quickly, so they don't do much damage on their own
They can leave you wide open on block
Auto-combos don't make the best use of special moves or meter
Doing auto-combos frequently makes you too predictable to your opponent.
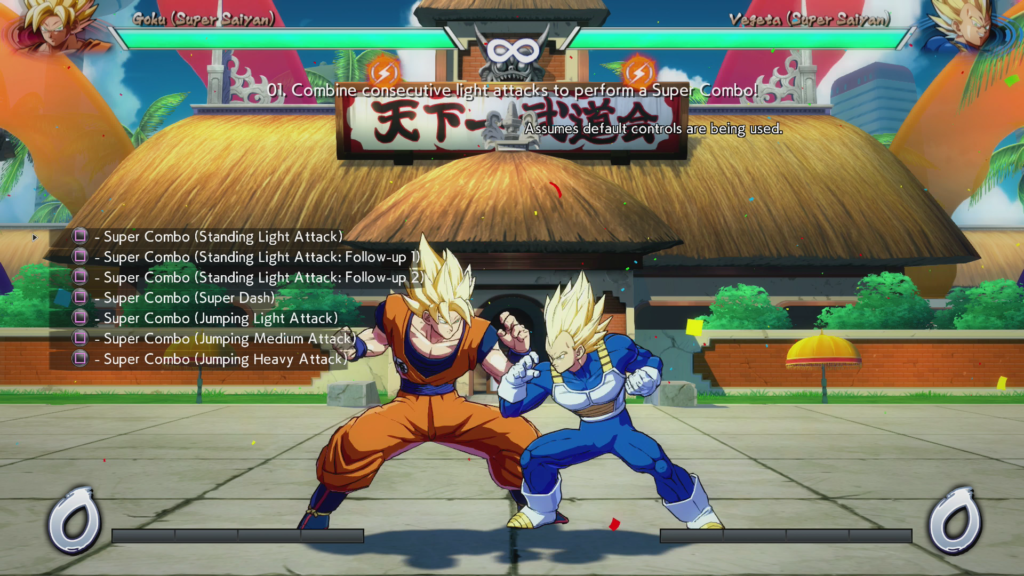
Image: Bandai Namco | This doesn't help anyone
It would be more useful if the game taught other sample combos to newcomers. Most characters can do light-to-medium-to-heavy attack strings, but not the other way around. Most characters also control very similarly to one another, so there's no excuse not to give new players more examples of how they can fight other than just mashing the same buttons over and over.
Heavy Attacks
Heavy attacks are important in a variety of ways. For one thing, you can dash in after the opponent and continue hitting them for some damaging combos if you connect the launcher. The tutorial makes this clear, at least.
What it doesn't make clear is that you can only launch an opponent once per combo, but you are not limited to using the same input only once per combo. So, you can do launchers in the air. You can also perform the same attack in the air again, without the "launcher" property in effect, for a follow-up, or to open up the opportunity for a safe tag.
It also doesn't tell you that hitting the Down+Heavy attack to perform the launcher has a protective barrier against certain attacks. If your opponent tags in one of their characters, or if they do a super dash and fly at you, this is the perfect time to launch them into the air because you are almost guaranteed a direct hit.

Image: Bandai Namco
Tips
Refrain from using a launching Down+Heavy attack in your combo strings unless you can vanish attack quickly behind them to make the attack safe. If the opponent blocks, you are left wide open for a punish.
A launch or "smash," as it's known in the game, is illustrated by the camera changing angles and zooming in on the hit. Likewise, there's also a slamming smash that has the properties to cause the opponent to be sent back down to the ground in a way that causes a hard knockdown, where they can't get back up right away.
Smashes and slams can only be done once per combo, except if using the light-auto combo special move to extend it or a super attack.
Vanishing Attacks
Vanishing Attacks are a unique move in Dragon Ball FighterZ. Press two buttons together, and your character vanishes, then suddenly reappears behind your opponent with their limb outstretched in a kick animation. Doing this move by itself is useful only to the extent of getting some decent raw damage and getting out of a tough spot by getting behind your opponent. But the tutorial doesn't tell you everything else you can do with it, which is infuriating.
Tips
You can cancel almost any normal or special move into a vanishing attack during any frame of animation. This can be good for faking out your opponents when attacking, but bad if you're in the middle of a combo and you don't connect the hit before vanishing.
Cancelling into a Vanish Attack has special wall-bounce properties. If a move of yours connects with the opponent, you have a few frames while they're stunned to vanish behind them and hit. This causes the opponent to bounce off the wall, allowing for follow-up combo attacks.
If a Vanish Attack is done on the ground, it is safe on block. If someone is being extremely aggressive and you're blocking their attacks, continue blocking if they vanish. The attack, while seemingly unsafe, is misleading. Most attacks cannot punish a blocked Vanish Attack unless the VA was done while the opponent was higher in the air.
Holding down the buttons while in sparking blast mode allows you to vanish behind the opponent without attacking. This can be extremely useful in mixing up your opponent and in using the move to get out of a tough spot. Since the kick attack may cause the opponent to bounce out of range of follow-up attacks, you may not get the combo opportunity you want. By holding down the buttons, however, you do a simple vanish and appear behind the opponent, capable of doing whatever moves you want.
Vanish can be expensive with your meter. It uses up a full bar of your super meter, so it's good to have at least one bar ready at all times if you need it to escape rather than using the bar all up on supers. Also, in a combo that uses a Vanish Attack wall-bounce, the rate at which the super meter increases during the combo drops dramatically after the vanish. Therefore, it's recommended you wait until the end of your combos to utilize the wall bounce property.
Dragon Rush
Dragon Rush is the equivalent of a grab or throw. If the opponent is blocking a lot, you can perform a Dragon Rush. Your character will zip in and start pummeling the other. The game is nice enough to illustrate that the best time to use it is when the opponent is blocking. It also thankfully mentions that one of the primary reasons to use it is to force your opponent to tag in another character.
However, it doesn't do anything about trying to force you to use Dragon Rush in certain situations. The tutorial simply tells you how to do it on the ground or in the air. It doesn't bother to tell you that a good time to use it is while your opponent is being hit by or blocking an assist attack. It also doesn't tell you the instances in which you can follow it up with a super.
Image: Bandai Namco
Tips
Use it when an opponent is blocking. It acts like a throw, so the opponent will only have a short amount of time to react and prevent it from connecting. After it does you can do a regular air combo for 30% or more damage.
Use it to force your opponent to tag in another member of their team. This is crucial in instances where you want to prevent one of their characters from healing off-screen. If you can grab the person on the ground and then hit the tag button that corresponds to the desired character's slot, you will get the opponent you want. More often, though, you will need to perform the grab in the air. In this case, take the opponent to the air and perform a vanishing attack cancel to cause a wall-bounce. On the wall-bounce rebound, Dragon Rush them and force the tag.
Use it while the opponent is still stunned from an assist attack. While the opponent cannot be Dragon Rushed if actively blocking an attack by an assist, you can still time it to do it immediately after the assist's attack finishes. This is a great way of mixing up the opponent, who may be very good at defense.
Dragon Rush performed at the start of the combo fills up a bar of meter. After your character launches the opponent into the air and flies after them, the super meter shoots up to almost a full bar. Keep the combo going long enough, and you're sure to have enough for a superattack.
Super Dashing

Image: Bandai Namco
Superdashing occurs when you press the special (ki) attack button and the heavy attack button at the same time. Your character then takes to the air and zips across the screen with a glowing aura. Dragon Ball FighterZ shows you how to do this, but it doesn't spend much time telling you when you could, should, or shouldn't do this.
You can perform a super dash from anywhere on the screen. However, it will only travel a certain amount of distance. If you're up at the very top of the screen, it may not last until you hit the bottom.
You can perform a super dash only once while in the air. Once you perform a super dash, you cannot do another until the character's feet touch the ground.
You can perform a super dash to track the opponent. If you're having trouble staying on target and your opponent is jumping all over the place, this can be a way of keeping pressure on them.
You should use super dash to chase down opponents who are in a stunned state. This occurs after you connect a heavy attack that then launches them into the air or against the wall. This can also occur when performing an assist attack, allowing you to close the gap and continue the combo.
You should use super dashing to close the gap on opponents who are spamming the special (ki) button. Almost every character has the ability to shoot out tiny fireballs at a rapid pace. Superdashing actually adds a small amount of protection from these types of attacks. If Goku is blasting a bunch of little fireballs, super dash in and watch all the little fireballs bounce off of you as you close the distance. Most often, you will be able to connect a combo while the opponent is locked in fireball animations. Be aware that you are not protected from special attacks or super attacks.
You should not use super dashing from full-screen distance to close the gap on an opponent who is on the ground in a neutral stance. The super dash, while extremely useful, is extremely vulnerable. Hitting Down+Heavy Attack is the fundamental counter to a super dash, as it will win 90% of the time and launch the dashing person into the air for an easy combo. Doing a super dash from far away only gives the opponent more time to react and punish it.
Basic and Advanced Tagging
Image: Bandai Namco
I honestly cannot believe the fact that the game does not teach you this stuff. Tagging characters in and out of the fight is the core mechanic of this game, so there's really no reason why anything should be left out in the tutorial. Yet, its tagging lessons consist of how to hold down a button to tag, how to press forward and the tag/assist button, how to call in a tag during a super attack, and how to tag out an opponent. That's enough to get the job done, but it doesn't bother to tell you about the different ways you might be able to tag characters in while performing a super, while blocking, or during a combo.
Of the most egregious failures to inform its players is the concept of block canceling into a tag. By pressing forward and the tag button under normal circumstances, you can bring in your next fighter. Doing so causes them to fly in across the screen a super dash, which can help extend combos, but also leaves them open for an opponent's counterattack. If, however, you press the buttons while in the middle of blocking an opponent's combo, you get a different type of tag. A bar of your super meter is used, and the opponent comes in without super-dashing. This is a great way of getting your fighters in while under pressure.
Next, there's the idea of performing super-attack combos with your tags. Much like Marvel vs Capcom, if you perform a super move and then press one of the assist buttons while the super is active, your next character pops in and performs their super attack. The game, thankfully, teaches you this much. It does not teach you that to perform the level 3 super for a character that is being tagged in, you need to hold the "back" direction down while calling them in. It's a simple thing to perform that you may discover on your own, but it's stunning to me that it is not included in the tutorial.
Finally, there's the more advanced super tagging option. By tagging in your other characters while performing super moves, a lot of your meter is used up. It's a safe way of tagging out characters, but it's expensive. If, however, you want to tag your character out without having to use the first bar for the character that is currently on-screen, you can. Nowhere, NOWHERE in the game does it say anything about this! I had to look this up on a forum somewhere to learn this. While performing a combo and while your opponent is stunned by an attack, perform the half-circle forward motion and press the assist button. This summons the next character to perform their superattack, allowing you to tag out your other character and perform a superattack with the use of only one bar. Likewise, if you perform the half-circle motion away from the opponent, you get the level 3 super of the assisting character. This can be extremely useful for characters who do not have super attacks in the air and need to be swapped out while it's safe.
Sparking Blast
The last thing I'll mention is how the sparking blast mechanic changes the properties of your character. Dragon Ball FighterZ tells you that it's useful to use as a burst to get your opponent off you. It also tells you that it increases your damage and defense in addition to actively healing your character on-screen. However, it fails to talk about how it changes the Vanishing Attack, as I mentioned above. It also neglects to mention these other facts:
Performing the overhead attack that every character has (forward+medium attack) while Sparking can be canceled into an air dash, allowing you to link into a full combo. This is something you cannot do when not sparking.
Your light attack speed increases to the point that, if you do not perform an auto-combo, you can hit an extra one or two times during an air attack.
The damage boost of sparking blast does not increase if there are fewer characters alive on a team. Only the timer changes based on the number of live teammates.
The start-up frames of a Sparking burst are invincible, while the ending frames of the animation are not. The game tells you that it's a good way to get yourself free of pressure, but it doesn't bother to mention how unsafe it is if your opponent is waiting for it. While you can use your sparking blast to avoid damage for a second, after the red blast dissipates, your character is open to attack.
Other Tutorials Worth Watching
Below are some YouTube videos that help discuss some of these same points in action, along with some other mechanics that I didn't cover.
Fan of death metal? Check out my band on Bandcamp and Soundcloud. If you like what you hear and want to hear more, head to HoundsofInnsmouth.com for more info!